Sketch3 And PaintCode
If you've learned Sketch or if you know how to illustrate using vectors (Adobe Illustrator), you should consider giving PaintCode a try.
PaintCode is a Mac Desktop app that lets you control your designs programmatically. It is mind blowing!!!
Last night I set out to learn PaintCode. My idea was to animate Wormy the bookworm riding Timothy the train (no connection to the popular train series).
Here's the process I use for converting a Sketch3 into an iOS animation (or gif) with PaintCode:
- Design in Sketch3
- Export layers as SVG
- Import SVG layers into PaintCode
- Separate and link up layers to derived variables
- Export as Swift or Obj-C
- Create a view inside your app on Storyboard
- Render images into an Array
- Link the image array to an UIImage object
- Build and Run
quick note: these are stages vs steps and you will find yourself hopping around each stage as you fine tune your designs.
Design in Sketch
Last night I decided to learn PaintCode. I was about to tweet out asking for ideas when I realized I have wanted to build a custom ActivityIndicator when people pull-to-refresh content on my app. (I'll be covering my experience going through tutorial later)
I opened up Sketch and drew a background... I made some hills, clouds, dirt, and a train track. The width of this background is 600px. This width will allow enough space for moving the background to the left as Timothy chugs along.

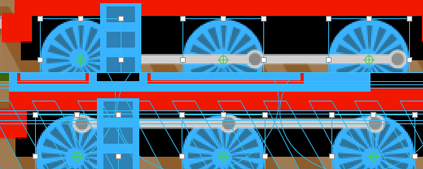
Next, I drew Timothy the Train (the original files are much more detailed). The bar connecting three wheels is a group of shapes. Later, I explain how to animate them in a realistic fashion.

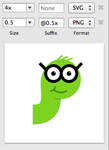
I then cropped out wormy from one of the drawings I made prior. I want him to move up and down as the train wheels turn.

I aimed for a final target scene 400 pixels wide by 100 ixels high to account for the wider screens on the iPhone 6/+. To accomodate smaller screens, I use constraints and pin the sides to the leading and trailing edgesof the view. The height should keep the same aspect ratio depending on width of screen.
Export Layers as SVG
Sketch3 lets you easily export art in any popular format (PNG, JPG, SVG). Since you're drawing vector art you can provide a multiplier to easily scale up the resolution for higher levels of detail.
I exported each asset as a 4x SVG.

Import SVG Layers into PaintCode
You must ipmort the SVG layers from Sketch 3 into PaintCode.
PaintCode will maintain groups and layers from Sketch 3.

For this stage I had to go back to Sketch3 multiple times to adjust the distribution of track cells, clouds, and hills in background.
It is important to think through how you expect your animation to occur. Getting your source layers right before you start animating will save you headache in the end. If it's a simple loop, you might not need a background. Fewer layers means less complexity. Very complex scenes will render very large Swift/ObjC files.
Separate and link layers to derived variables
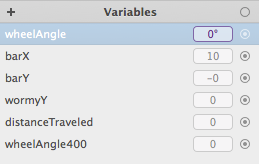
Here is a list of the variables I track:

In my animation I track how far the train has "traveled". The background graphic has an extra 200 pixels worth of image that is used to simulate movement. Once the train has traveled the 200 pixels, it is reset back to 0. The animation then continues this loop.

I also link the rotational value of each wheels to an expression derived from the distance needed to travel. Each wheel is comprised of a back blue section, 16 spokes, and a wheel cap. These are all grouped together as a Sketch3 Symbol (makes editing them all at once much easier)

The rotation cycles through 400 degrees. I map perform some math 360*wheelAngle/400 for calculating where the rotation of the wheel needs to be in order to complete a full rotation at the 200th pixel.
I link the x (left/right) position of the wheel bar to the cosine of the rotational value of the wheel. I then link the y (up/down) position of the wheel bar to the sine of the rotational value of the wheel.

I also link the y position of wormy to bounce around on the train.

Export as Swift or Obj-C
When your animations are working properly export the project to Swift or Objective-C.
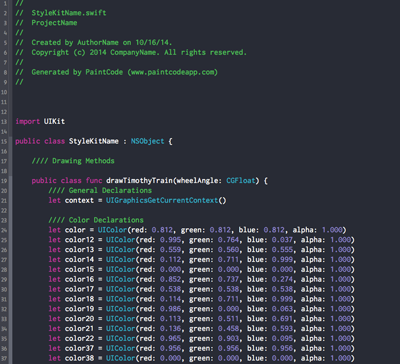
A file will be generated with either one or two functions. The first, main function if run will generate the graphic for the scene that you designed. Input variables from PaintCode will be converted into required parameters for the drawing function.

Create a UIImageView inside your Storyboard
In this demonstration I will generate an animated image. To display this in my application I create a UIImageView in my Storyboard. I then expose an @IBOutlet imv of type UIImageView that I link in Storyboard.
Render images into an Array
Next I run a for loop and generate an array of images. These images will be iterated through for the animation.
I create an NSMutableArray to hold the output of the StyleKitName.imageOfTimothyTrain() function.
Link the image array to an UIImage object
Next I create a UIImage object im and link create an animated image composed of the array of images.
I finally set the imv UIImageView's image variable to the animated image.

Build and Run
Finally I build and run!
